{config.cms_name} Home / News / Industry News / How Do You Choose and Install the Right Child Safety Seat
JIANGSU HAPPY BABY SAFETY SEAT CO., LTD.
Industry News

How Do You Choose and Install the Right Child Safety Seat

2026-07-10

CHILD PASSENGER SAFETY GUIDE

Content

How Do You Choose and Install the Right Child Safety Seat?

A child safety seat is a purpose-designed restraint system that helps protect infants and children during sudden braking, frontal impacts, side impacts, and other vehicle collisions. The correct product must match the child’s size, the vehicle seating position, the installation method, and the applicable safety requirements.

Correct Stage Rear-facing, forward-facing, or booster use based on the child’s height, weight, and development.
Correct Installation Secure installation using the vehicle belt or approved lower anchor system.
Correct Harness Fit Flat, properly routed, and closely adjusted webbing without excessive slack.
DIRECT ANSWER

What is a child safety seat?

A child safety seat is a vehicle restraint designed around the smaller body dimensions and developing skeletal structure of a child. Unlike an adult seat belt, it positions protective webbing across stronger areas of the body and limits excessive movement of the head, neck, chest, and pelvis during a collision.

Child safety seats may be secured with a vehicle seat belt, lower anchors, or another approved vehicle attachment method. Some models are designed for only one stage, while convertible and multi-stage products can be adjusted as the child grows.

01

What Are the Different Types of Child Safety Seats?

Product type should be selected according to the child’s measured size rather than age alone.

01

Rear-Facing Infant Seat

Designed for newborns and smaller infants. The seat faces the rear of the vehicle so the shell can support the child’s head, neck, and spine across a wider surface during a frontal collision.

Primary restraint Integrated harness
02

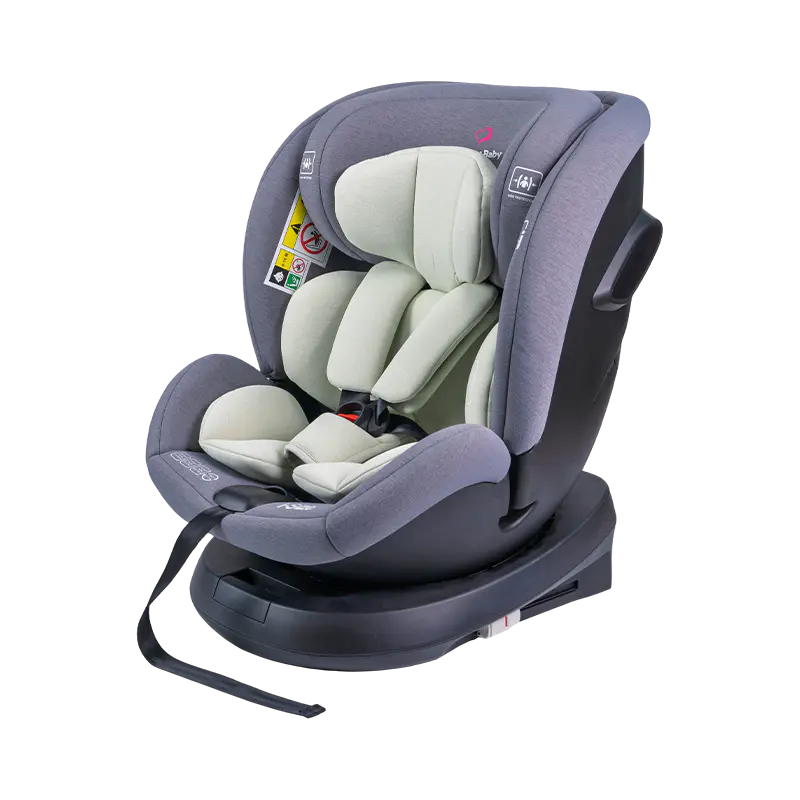
Convertible Safety Seat

Can normally be used rear-facing first and then changed to forward-facing after the child reaches the permitted rear-facing height or weight limit.

Primary advantage Longer usable period
03

Forward-Facing Harness Seat

Intended for children who have exceeded the rear-facing limit. It uses an internal harness and should generally be connected to the vehicle’s top tether anchor when required.

Primary restraint Five-point harness
04

High-Back Booster Seat

Raises the child and guides the vehicle shoulder belt across the center of the chest and shoulder. The back structure can provide belt positioning and additional head support.

Primary restraint Vehicle three-point belt
05

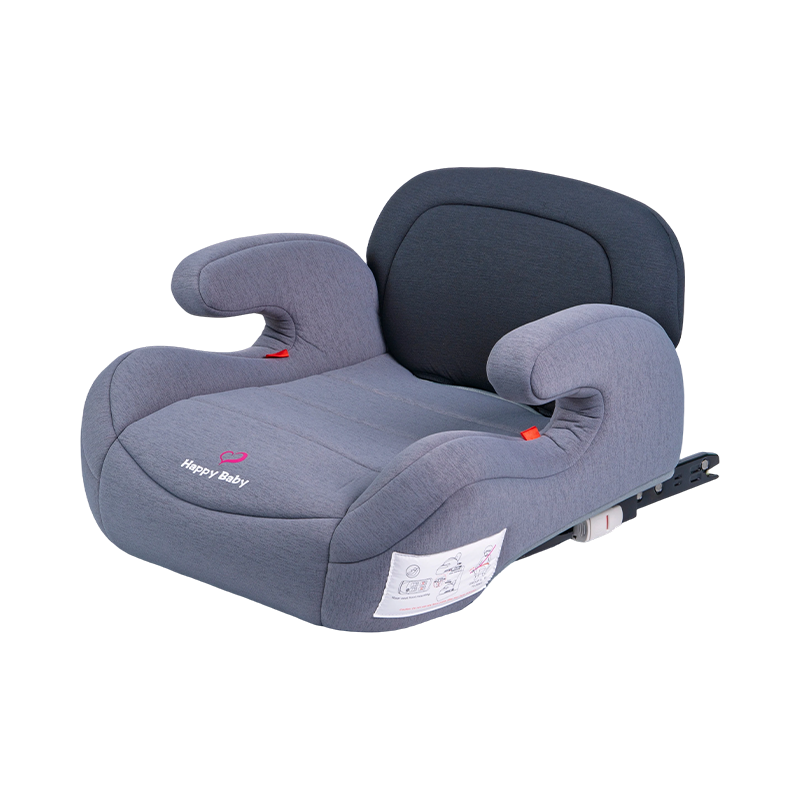
Backless Booster Seat

Suitable only when the vehicle seat or head restraint provides sufficient head support. It improves lap and shoulder belt positioning without adding a separate back section.

Vehicle requirement Adequate head support
06

Multi-Stage Child Seat

Combines several operating modes in one product. Each mode has its own belt path, harness setting, height limit, weight limit, and installation procedure.

Important check Correct mode configuration

02

How to Choose the Right Child Safety Seat

The safest option is one that fits the child, fits the vehicle, and can be used correctly on every journey.

Start with measurable requirements

Age is useful as a general reference, but it should not be the only selection factor. Parents and vehicle users should check the child’s current weight, standing height, seated shoulder height, head position, and ability to maintain a stable posture.

Child size range Confirm that the child is within the permitted height and weight range for the selected operating mode.
Vehicle compatibility Check seat-belt geometry, anchor positions, top tether availability, head restraints, and rear-seat space.
Installation direction Keep the child rear-facing until the stated rear-facing limit has been reached.
Harness adjustment Make sure the shoulder slots, buckle position, and harness length suit the child’s body.
Daily usability Select a product that caregivers can install, tighten, clean, inspect, and adjust correctly.
Product history Avoid products with unknown collision history, structural damage, missing parts, or unreadable labels.

Three-part fit test

1
Fits the child

The restraint stage and harness geometry match the child’s dimensions.

2
Fits the vehicle

The seat can be installed securely in an approved seating position.

3
Fits daily use

Caregivers can repeat the correct installation and adjustment process consistently.

03

How to Install a Child Safety Seat

Always follow both the child seat instructions and the vehicle owner’s manual.

STEP 1

Select an approved rear seating position

Review the vehicle manual to identify permitted seating locations, lower anchors, top tether points, belt-locking functions, and any restrictions relating to center seating positions.

STEP 2

Set the correct operating direction

Configure the product for rear-facing, forward-facing, or booster use before installation. Do not use a belt path intended for another mode.

STEP 3

Choose one approved attachment method

Use either the vehicle belt or the approved lower anchor system unless the product instructions specifically permit another arrangement. Route the belt only through the marked path for the selected mode.

STEP 4

Apply pressure and remove slack

Press the seat into the vehicle cushion while tightening the belt or anchor strap. Check movement at the attachment path rather than pulling on the upper edge of the shell.

STEP 5

Connect the top tether when required

A forward-facing child safety seat often uses a top tether to reduce forward rotation and head movement. Connect it only to the designated tether anchor.

STEP 6

Position and tighten the child harness

Remove twists, select the correct shoulder-slot height, position the buckle correctly, and tighten the harness until excessive webbing cannot be pinched at the shoulder.

A properly installed child safety seat is secure at the belt path

A properly installed child safety seat is generally expected to move no more than approximately 25 mm from side to side or front to back when tested close to the installation path. This movement check does not replace the product instructions, vehicle manual, or local inspection requirements.

04

Child Safety Seat Stage Comparison

The transition to the next stage should occur only after the current mode limit has been reached.

Restraint stage Typical direction Child restraint method Main selection condition
Infant seat Rear-facing Integrated harness Child remains within the rear-facing height and weight range
Convertible seat Rear-facing or forward-facing Integrated harness Correct mode, belt path, recline setting, and harness position
Forward-facing seat Forward-facing Integrated harness and top tether where required Child has exceeded the permitted rear-facing limit
High-back booster Forward-facing Vehicle lap-and-shoulder belt Child has exceeded the harnessed-seat limit and can sit correctly
Backless booster Forward-facing Vehicle lap-and-shoulder belt Vehicle provides adequate head and belt-positioning support
Adult seat belt Forward-facing Vehicle lap-and-shoulder belt Belt fits the shoulder, chest, hips, and upper thighs correctly

05

Should My 3 Year Old Be in a Car Seat or Booster Seat?

Age 3 Harnessed seat is usually appropriate

Most three-year-old children should remain in a child safety seat with an integrated harness rather than move to a booster seat. A child who is still within the rear-facing limit can continue riding rear-facing. After exceeding that limit, the child can normally use a forward-facing harnessed seat.

A booster seat requires the child to maintain the correct seated position for the entire journey. The child must not lean forward, move the shoulder belt behind the back, place it under an arm, or allow the lap belt to rise onto the abdomen.

Recommended decision basis: Use the height and weight limits of the harnessed child seat, not age alone.

06

Does My 7 Year Old Need a Carseat?

Many seven-year-old children still need a booster seat because an adult seat belt may not yet fit correctly. The decision should be based on belt fit, seated posture, child size, vehicle seat geometry, and local legal requirements.

A high-back booster may be useful when the child needs shoulder-belt guidance or when the vehicle seat does not provide sufficient side and head support. A backless booster may be suitable when the vehicle already offers appropriate head support and the belt follows the correct path.

Vehicle seat-belt fit test

01

The child’s back remains against the vehicle seat.

02

The knees bend naturally at the front edge of the cushion.

03

The lap belt remains low across the hips and upper thighs.

04

The shoulder belt crosses the center of the chest and shoulder.

05

The child can maintain this position for the entire journey.

Important: When any part of the belt-fit test is not satisfied, the child should normally continue using an appropriate booster seat, subject to product instructions and local regulations.

07

When Did Child Safety Seats Become Law?

There is no single worldwide date because child-restraint laws were introduced separately by different countries and regions.

Regional legislation

Early child-restraint requirements were introduced through regional or state-level legislation. These rules were later expanded to cover older children, booster-seat use, rear seating positions, and more specific restraint categories.

National requirements

Some countries adopted national child-passenger requirements, while others continued to rely on regional laws. The applicable age, height, weight, exemption, and enforcement provisions may therefore differ.

Current compliance

Vehicle users should check the law that applies in the location where the vehicle is being driven. A legal minimum does not always represent the most protective use stage for an individual child.

When did child safety seats become mandatory?

Child safety seats became mandatory at different times in different jurisdictions. Some regions introduced requirements for infants first and later extended them to toddlers and school-age children. Local laws should be checked before defining an age-based product recommendation.

08

Manufacturing Details That Affect Product Reliability

Reliable protection depends on controlled materials, repeatable assembly, and verified component performance.

Seat shell structure

The shell must maintain dimensional consistency and provide stable load paths around the backrest, side wings, harness slots, base, and vehicle attachment areas.

Energy-absorbing layers

Foam density, thickness, placement, bonding, and coverage can affect how impact energy is managed around the child’s head and torso.

Harness webbing

Webbing width, tensile performance, abrasion resistance, stitching pattern, routing geometry, and adjuster operation require consistent process control.

Buckle and adjuster system

Buckles should provide repeatable engagement and release behavior. Adjusters must allow controlled tightening while resisting unintended loosening.

Anchor connectors

Lower connectors and tether components require accurate dimensions, secure assembly, suitable corrosion resistance, and reliable strap adjustment.

Textile components

Covers should fit the seat without obstructing harness slots, warning labels, buckle access, adjustment mechanisms, or ventilation areas.

09

Product Evaluation and Quality-Control Items

Dimensional inspection Shell, base, slots, anchor locations, moving parts, and assembly interfaces.
Harness performance Webbing strength, stitching quality, abrasion resistance, routing, and adjustment.
Buckle durability Repeated engagement, release force, contamination resistance, and component wear.
Installation verification Vehicle belt paths, lower anchor connections, top tether routing, and recline settings.
Material control Resins, metal parts, foam, textiles, labels, adhesives, coatings, and packaging materials.
Traceability Production date, batch identification, component records, inspection status, and documentation.

PRODUCT DEVELOPMENT FOCUS

Configuration options for different markets

Child safety seats may require different shell dimensions, restraint stages, labeling languages, warning formats, textile selections, packaging structures, and vehicle attachment configurations.

Product development should begin with the target regulation, child-size range, installation environment, vehicle compatibility requirements, and intended operating modes.

View child safety seat solutions

10

Common Installation and Usage Errors

01

Moving to forward-facing too early

The child is turned forward before reaching the permitted rear-facing limit.

02

Using the wrong belt path

The vehicle belt is routed through a path intended for another operating mode.

03

Leaving excessive installation movement

The child seat remains loose because the belt or anchor strap was not fully tightened.

04

Failing to use the top tether

A required forward-facing tether is left disconnected or attached to an unsuitable point.

05

Allowing harness webbing to twist

Twisted webbing cannot spread restraint loads as evenly as flat webbing.

06

Using a booster before the child is ready

The child cannot maintain the correct position of the lap-and-shoulder belt.

11

Child Safety Seats Frequently Asked Questions

Can child safety seats be installed with both lower anchors and a vehicle belt?

Use only the installation method permitted by the child seat instructions. Many products require users to choose either the lower anchors or the vehicle belt rather than use both methods simultaneously.

Can a rear-facing child safety seat be installed in the front passenger seat?

A rear-facing seat must not be positioned in front of an active frontal airbag. The rear seat is generally the preferred location for children, subject to the vehicle and child-seat instructions.

How tight should the child harness be?

The harness should lie flat against the child without twists or excessive slack. The product manual should be followed for shoulder-slot position, buckle placement, chest-clip position, and tightening checks.

When should a child move from a harness seat to a booster?

The child should normally remain in the harnessed mode until reaching the stated height or weight limit and until the child can maintain correct booster-seat posture throughout the journey.

How often should the installation be inspected?

Check the installation whenever the seat is moved, adjusted, cleaned, reconfigured, or used in another vehicle. Routine checks should also confirm that the child has not exceeded the current mode limits.

Can thick winter clothing be worn under the harness?

Bulky clothing can create hidden space between the child and the harness. Use clothing that allows the harness to remain close to the body and follow the child-seat instructions for cold-weather use.

CHILD RESTRAINT PRODUCT SUPPORT

Need a Child Safety Seat Configuration for a Specific Market?

Product planning can cover restraint stages, shell structure, harness systems, textile materials, installation methods, labeling, packaging, and quality-control documentation according to the intended application.